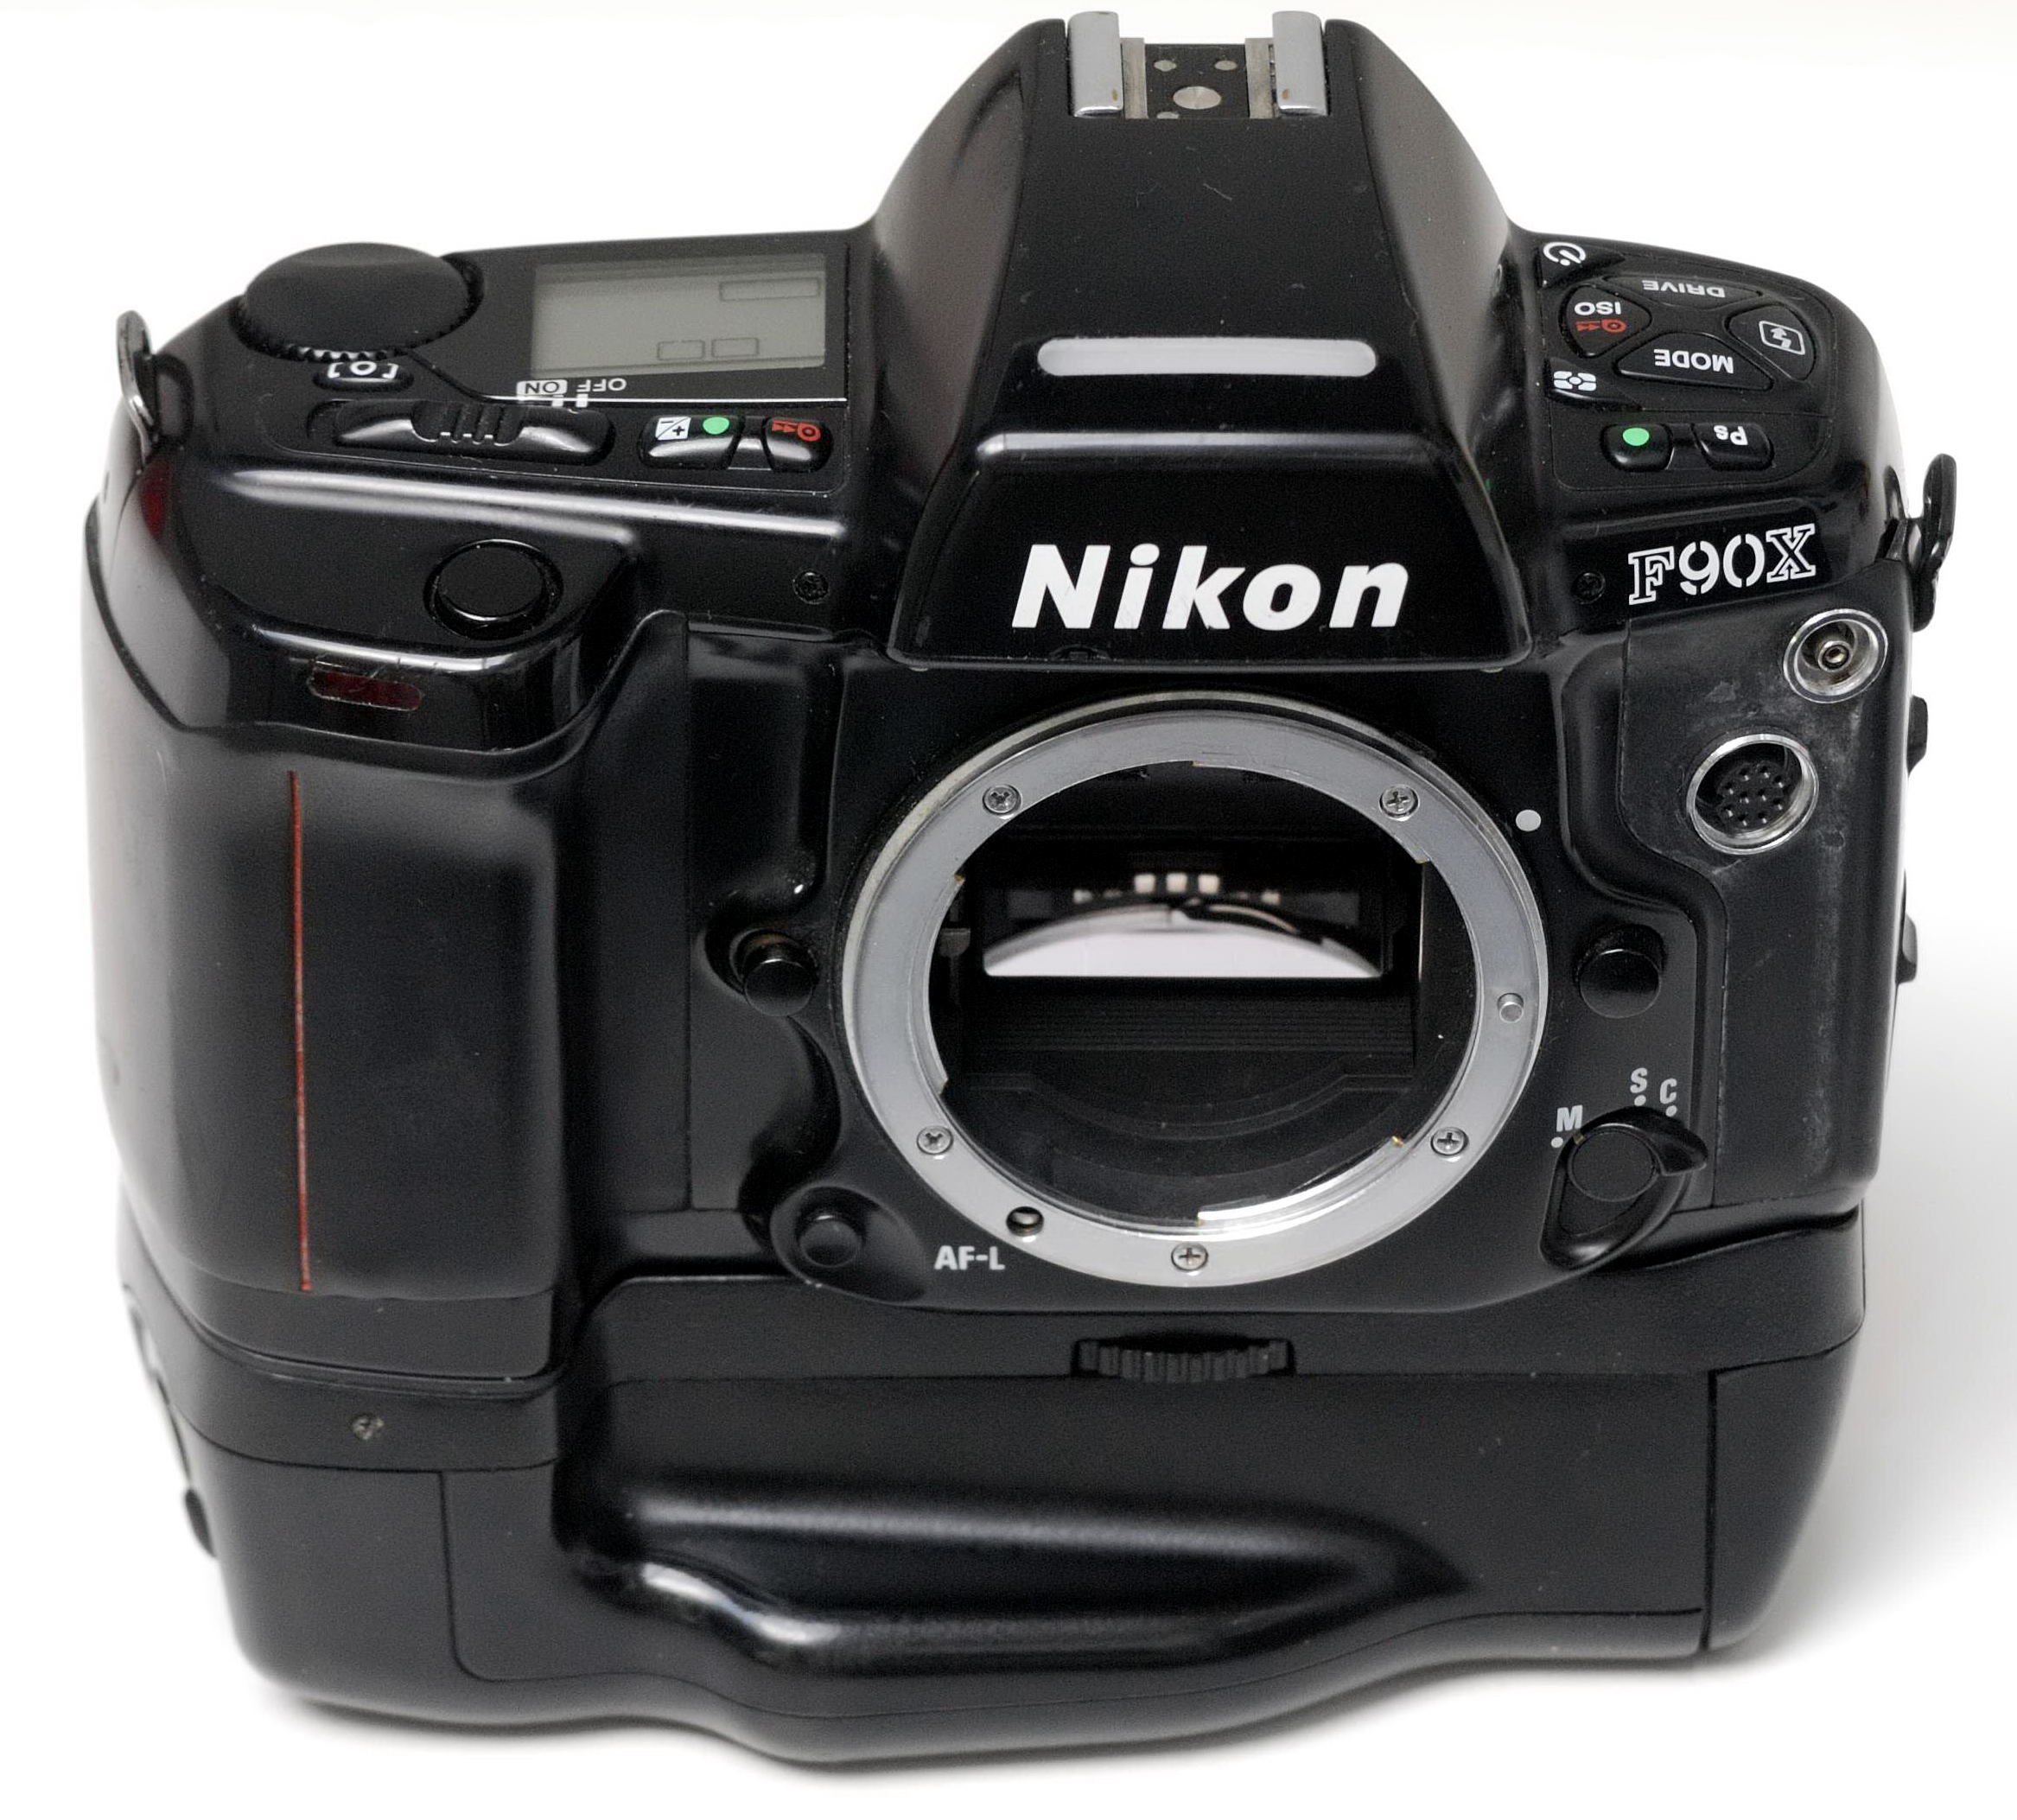
Nikon F90/N90 top cap replacement
How to open and renew/replace a top cap of the body of a Nikon F90 SLR? See below the step-by-step procedure. BTW: this exercise counts for a Nikon F-801/S and Nikon F-601M, too!
Attention: if you want to do this too, be sure that you are able to do this! Choose the right time, mood and tools. No responsibilities for mistakes, crashes, divorces and other disasters! All you need is patience, pair of tongs, screw driver for cross/philips screws and a soldering bolt. Note1: read this chapter first before you start to screw or solder! And write down what you are doing! Note2: you may think that the top cap of the Nikon F90 will fit the Nikon F90X and vice versa, but you are wrong!
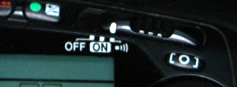
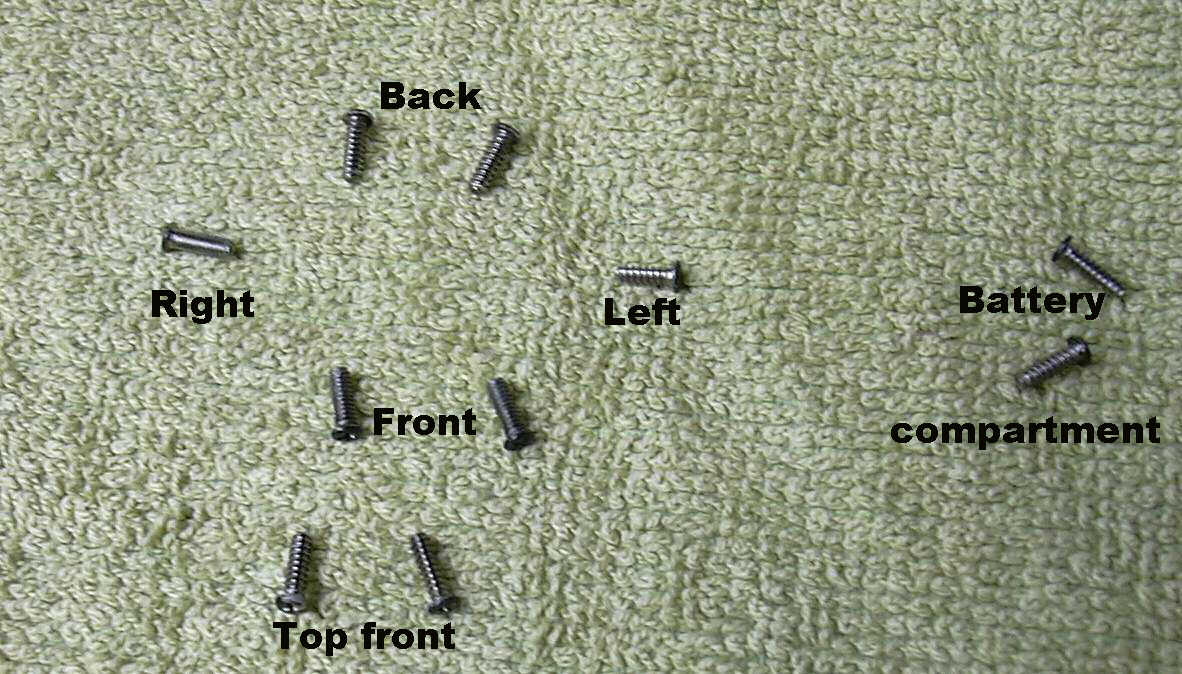
The on/off-button on the top cap of the F90 has three positions (see above), while the same button on the F90X has only 2 !! Before you start remove all batteries from the battery compartment and - if applicable - any film! To remove the top cap you have to unscrew 10 (ten) screws. Two are hidden in the bottom of the battery compartment, two are found op top of the lens mount, the others on the site, front and back of the cap. Write down which screw was where! All screws have the same length but their thread do not have the same pitch! Make a drawing of the top cap and mark which button should be where! When opening the top some buttons may drop out.
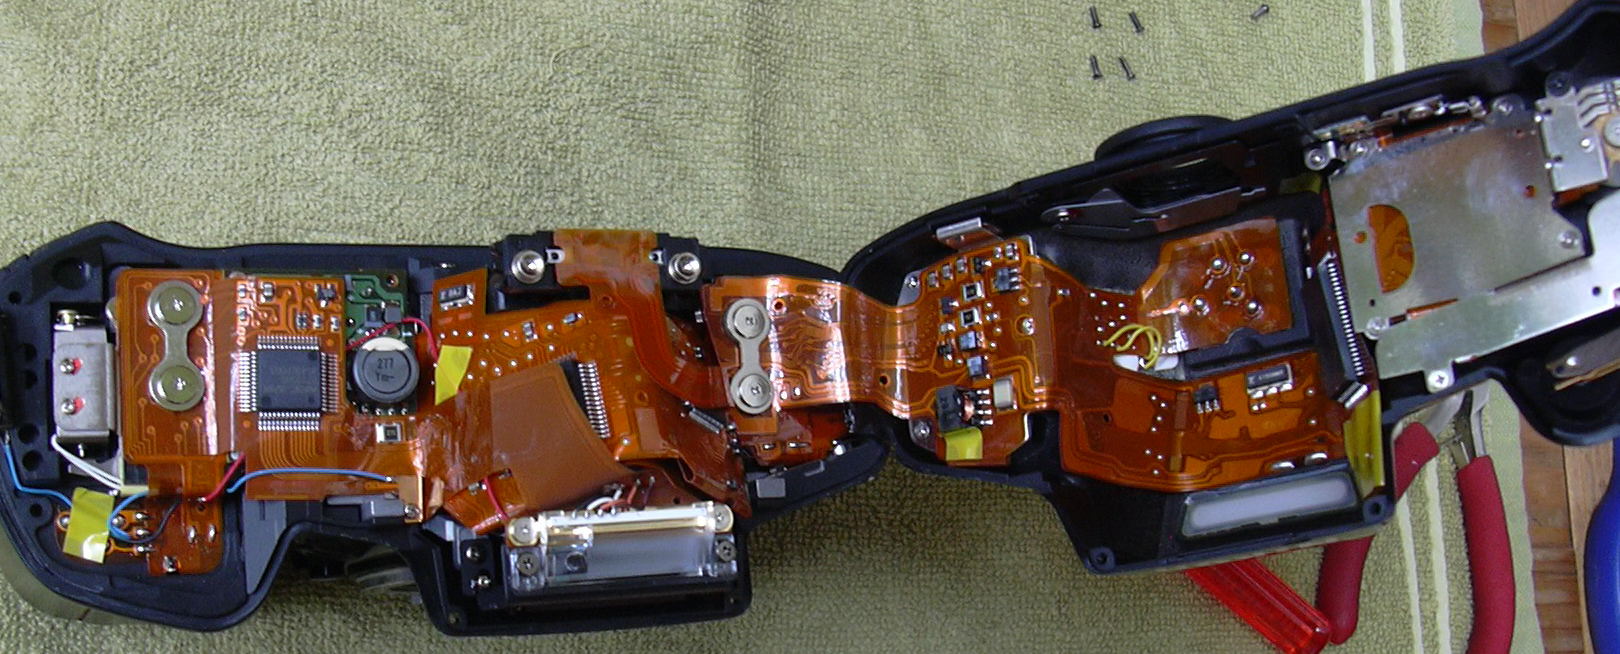
When all 10 screws have been removed wiggle the cap off, knowing that the internal flexible IC print is connected on the left side of the camera. So open the top cap by lifting the right side (shutter release button side) carefully. See below (and don't be frightened to death). Do not break the print!!
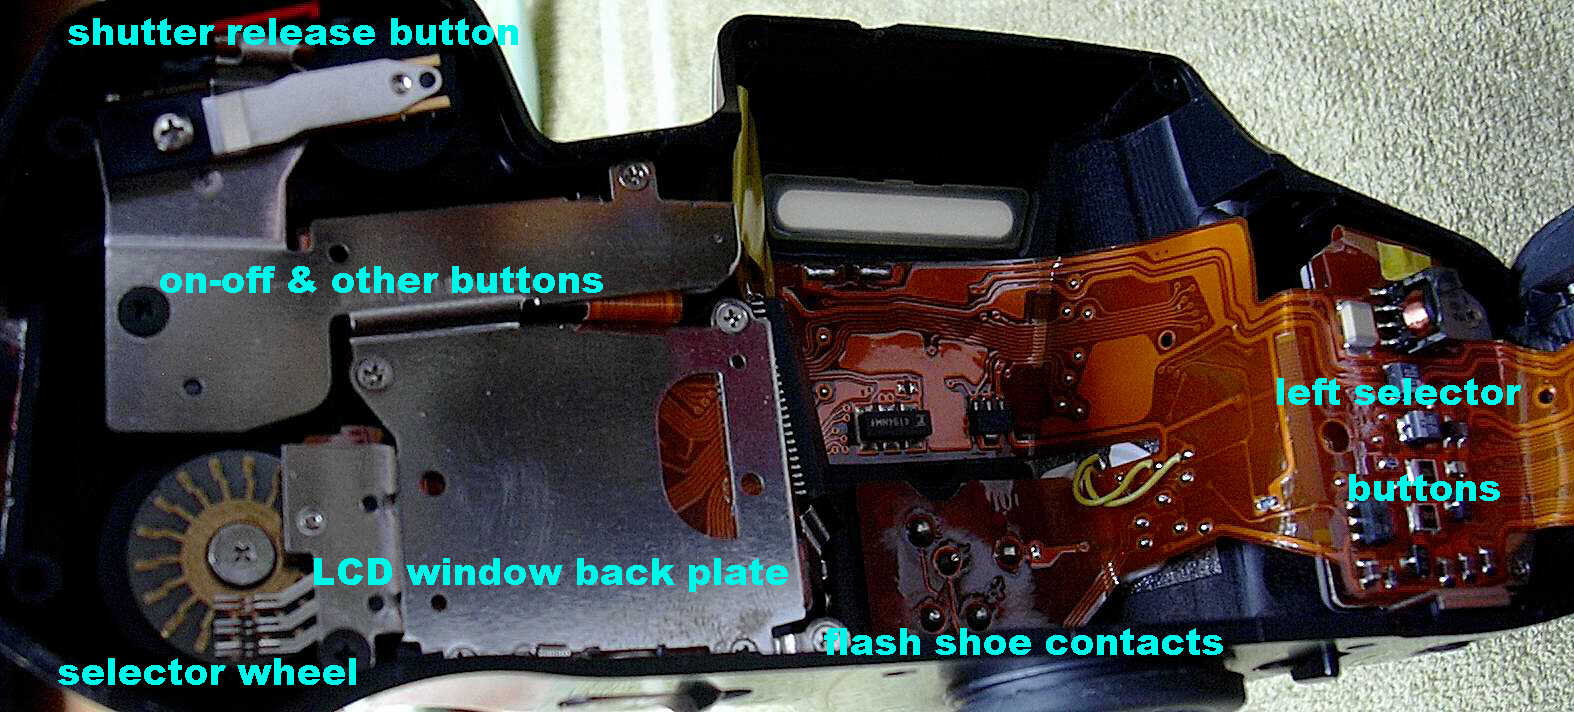
On the left the IC on top of the camera body with a connection to the IC inside the top cap on the right.
Above the most important parts inside the top cap. The next step is to unscrew all screws you'll see. Write down which screw comes where. Make a drawing or make a pictorial reminder as not all screws have the same size! There are three sections where you have to unsolder certain contacts. Inside the AE-Lock button there are two contacts, the flash shoe has 5 contacts and the white coin with two yellow leads. Unscrew first all screws, after that start soldering. Be aware of the tin on the contacts which is very soft and will molten easily. Do not use soldering tin! Write down what you are doing if your memory is bad.
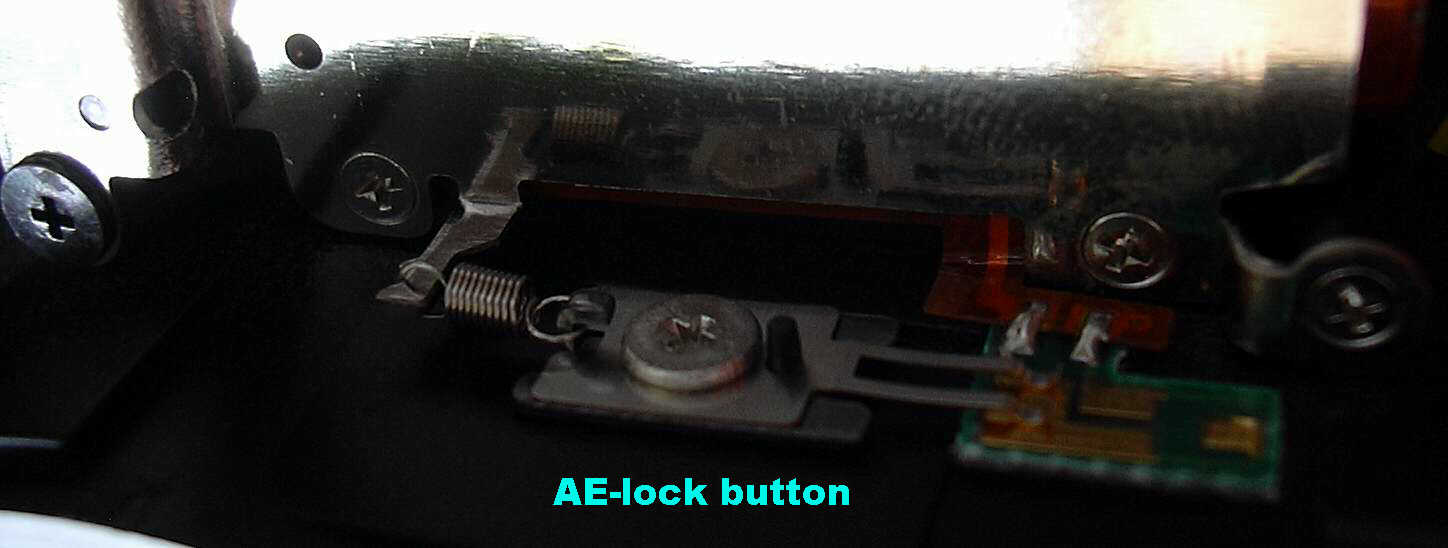
Unlock the little spring (and save it!) and unsolder the two contacts of the AE-Lock print.
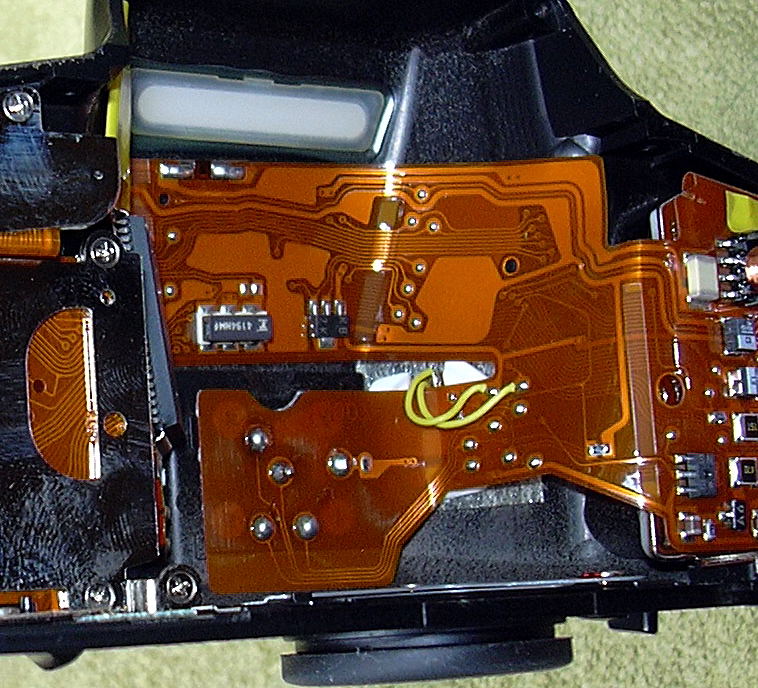
In the image above close to the viewfinder lens you'll see 5 contacts which are the connectors to the hot shoe or flash shoe on top of the top cap. Unsolder these contacts carefully and lift the print with a pair of little tweezers. The two yellow leads next to them have to be unsoldered as well. Write down which one was/is connected to which contact (the lead far inside - or the longest - to the right contact). When you have done the above you will be able to remove the entire print from the top cap. What now happens may puzzle you as some buttons will drop out of the cap. Therefore it is good to write down what belongs where! If you buy a new top cap from a Nikon representation it will come with a new window (not installed!), but with the viewfinder locker, the flash shoe and some locked buttons (on the left side) and the selector wheel + connector. The on/off-button should be included as well as a new window and its frame. The outside window has to be placed from the outside (comes as a sticker). The next step is to replace the new cap. Put all buttons back in place and fold the camera print into the new cap. Fasten one or two screws on the LCD-back plate. Start with soldering the two yellow leads, after that the 5 contacts of the flash shoe and at last the two little contacts of the AE-Lock (and refit the spring). Before soldering clean the soldering bolt thoroughly; to solder the contacts you do not need new or extra solder. If you have done the unsoldering carefully there will be enough solder for fixing the contacts. Put the top carefully back on the camera body and replace all screws at the right place/positions. Feed the camera with fresh batteries and try to trigger the shutter. Mount also a flash light and check if it works. If everything works, you'll have a new Nikon F-90X. If not, start from the beginning and check what went wrong. Good luck!!
|