How to adjust auto focus of a Nikon SLR camera(for both film and digital sensor) at your own risk!! Most Nikon auto focus single lens reflex cameras, using a film or having a digital sensor, have a built-in auto focus sensor 'looking' at the contrast of an 'incoming' image. A tiny built-in computer sends an impulse to the focusing mechanism in the camera or lens (AF-S and other lenses with built-in focusing motor). That auto focus sensor is located either in the viewfinder or somewhere under the mirror. If one is looking through the viewfinder and the image is sharp at the focusing point one hopes that the image will appear as sharp on the film or sensor. In some cases - however - it occurs that what was seen as sharp in the viewfinder, isn't sharp at all in the picture 'produced' by the film or sensor. This error is commonly called 'back focus'. The light beam from a sharp focus point, seen by the photographer's eye, should come as sharp on the film/sensor and on the auto focus sensor. If the mirror of the camera is out of its correct position the light beam will get to the auto focus sensor in the viewfinder and to the human eye as sharp but not at the film/sensor. This is possible with cameras that have been damaged, dropped or that have gone trough hundreds of thousands of exposures. Note: modern digital reflex cameras (D300 and later) have a special setting or tool in the camera menu. With that tool you can adjust the focus plain. Use and try it at various focus settings. It is very well possible that you may have to adjust the focus plain per lens. In some cameras it is possible to set the focus plain for each individual lens.
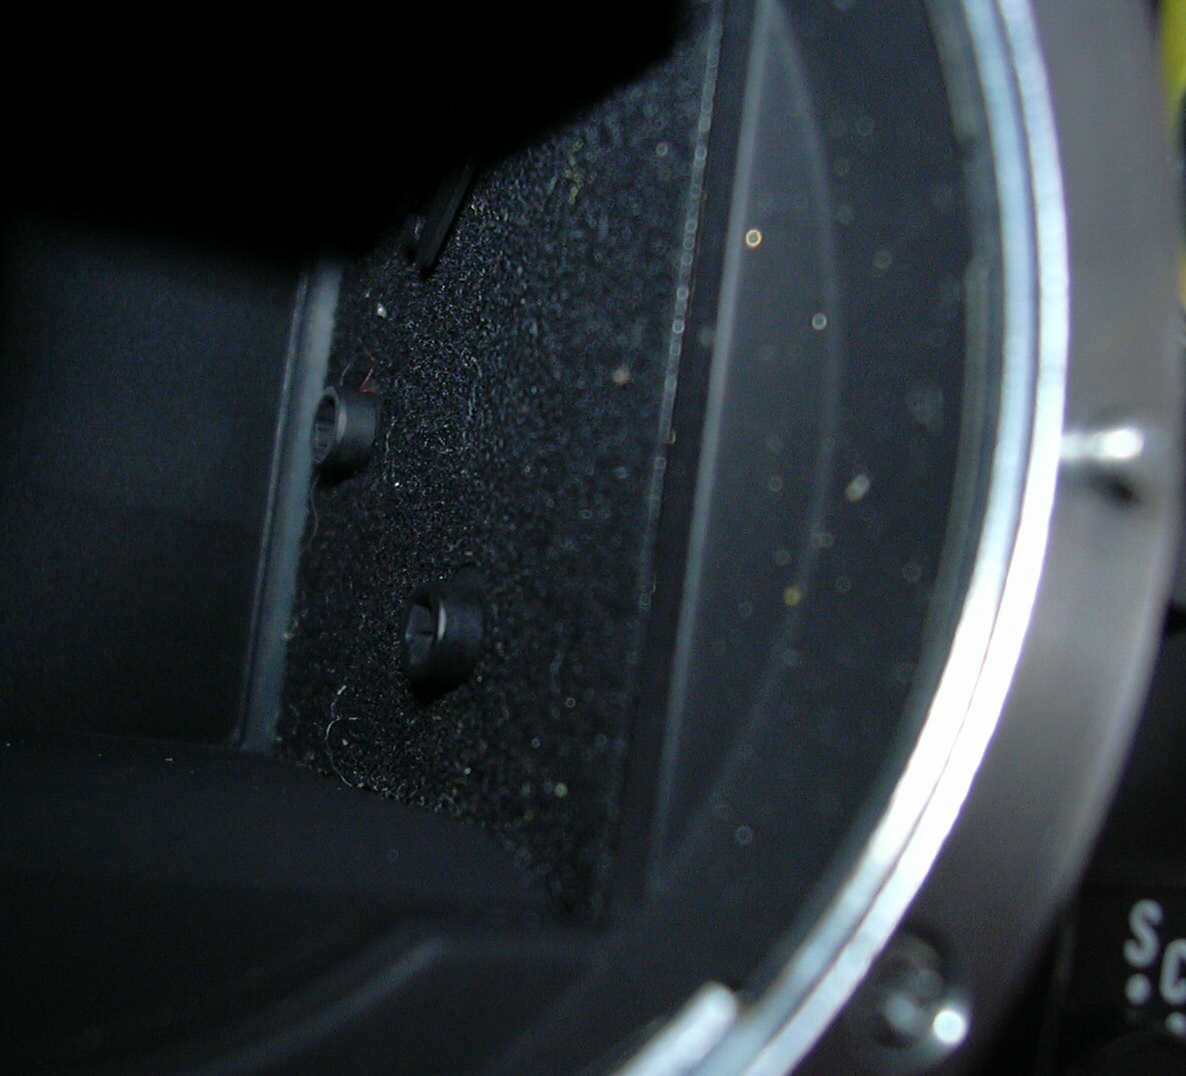
Under the mirror two Allen screws hold the mirror in its position. If you lift the mirror up carefully with a finger or a wooden stick (never use metal tools), you will see two little Allen* screws at the right side. The screw in front is holding the mirror in its position. That position can be adjusted with a small Allen key. If we talk about adjusting we mean less than one millimeter! How to proceed? Take your time as this is a time consuming procedure; so don't do it when you are in a hurry. All you need is a fast prime lens, a small Allen key and a PC with card reader, when a digital reflex camera needs adjustment. If a film SLR camera should be adjusted use a film and a fast prime lens and write down all exposures you have taken. * Allen screw, aka Hex, Inbus, zeta or Unbrako screw & key have a hexagonal socket/head.
Step-by-step adjustment of a film SLR. Warning!: this is not for ham fisted people!! 1. Put a (slow = low ISO number) film in your camera and mount it on a tripod. 2. Set the camera at A (aperture priority) or M (manual) and AF (auto focus). 3. Mount a fast prime lens and open its aperture to its maximum to gain a very small depth of field (DOF) area. 4. Take a text book and focus on a certain letter or line on a page that way that the lens in use is set at its closest focusing distance. 5. Make a picture while focusing on that particular letter or line. 6. Now take of the lens and lift the mirror and make an tiny, tiny adjustment CCW or CW with the Allen key and write down what you've just done. Try to remember the adjustment or make a tiny mark in the soft inner side of the mirror house. 7. Put back the lens and make the second picture exactly the way you did before! Proceed this way by adjusting the screw after each picture. Write down what you were doing. Along a longer Allen key you may make tiny curves in the soft side of the mirror house to remember the settings. 8. After developing the film you may determine which position gives the best results. Note: When using a non-AF lens watch carefully at the focusing aid in the viewfinder. When you see the focused object sharp the AF-signal should do so as well. Step-by-step adjustment of a digital SLR. It is clear that adjusting a mirror of a digital SLR is less time consuming. Connect the camera to a PC and you will able to see the results of each picture almost immediately. Proceed as written above (steps 1 - 7) and inspect the images after each exposure. You may zoom in by using Nikon View. As soon as you reach the correct position try more exposures at various distances. Note: Never lock the Allen screw with any paste or kit !! |